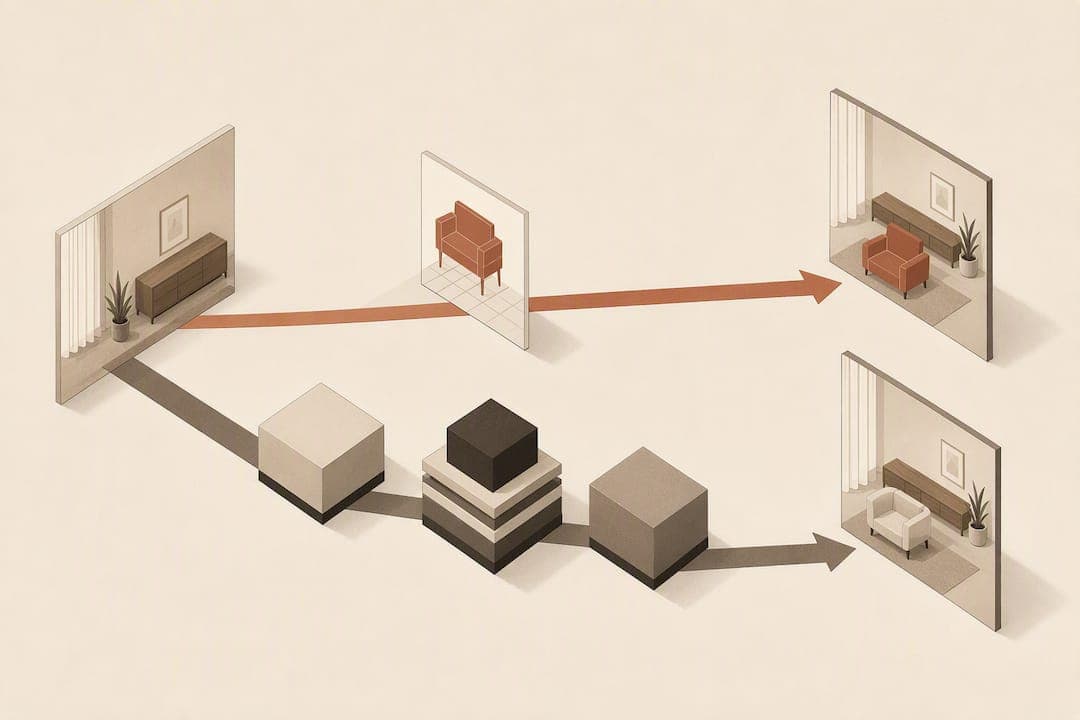
For furniture retailers, "web AR vs native AR" comes down to one practical question: can a shopper preview a sofa in their own lounge without downloading anything? Photo-based, no-download room previews answer that question directly, and for most furniture stores, they are the right first move. Shoppers upload a photo, the product gets composited in, doubt drops, and returns fall. It costs less to build and ship than any 3D or app-based alternative.
TL;DR:
- Photo-based room previews require no download and utilize simple image compositing, which makes them faster and more device-agnostic than 3D models or native apps.
- The process involves three steps: uploading or capturing a photo, server-side compositing of the furniture into the image, and returning a realistic preview within seconds.
- Using a free preview allowance allows retailers to run pilot tests on selected products, measuring impact on conversion rates and return reduction before full deployment.
- Realistic results depend on proper shopper input, such as framing the photo correctly and including the floor and wall edges to help the system judge scale and shadow placement.
- Photo previews are ideal for low-frequency furniture purchases, but higher-cost or made-to-order items may require more advanced visualizations like full 3D configurators.
Table of Contents
- What does "web AR vs native AR" actually mean for furniture retailers?
- How does a photo-based room preview actually work?
- Why photo previews outperform app downloads for furniture shoppers
- How do you actually roll this out on your store?
- What makes a room preview look convincing rather than fake?
- What does this cost, and how should you trial it?
- When photo previews win, and when you need something bigger
- Try the photo-preview approach on your own product page
- Sources
- FAQ
What does "web AR vs native AR" actually mean for furniture retailers?
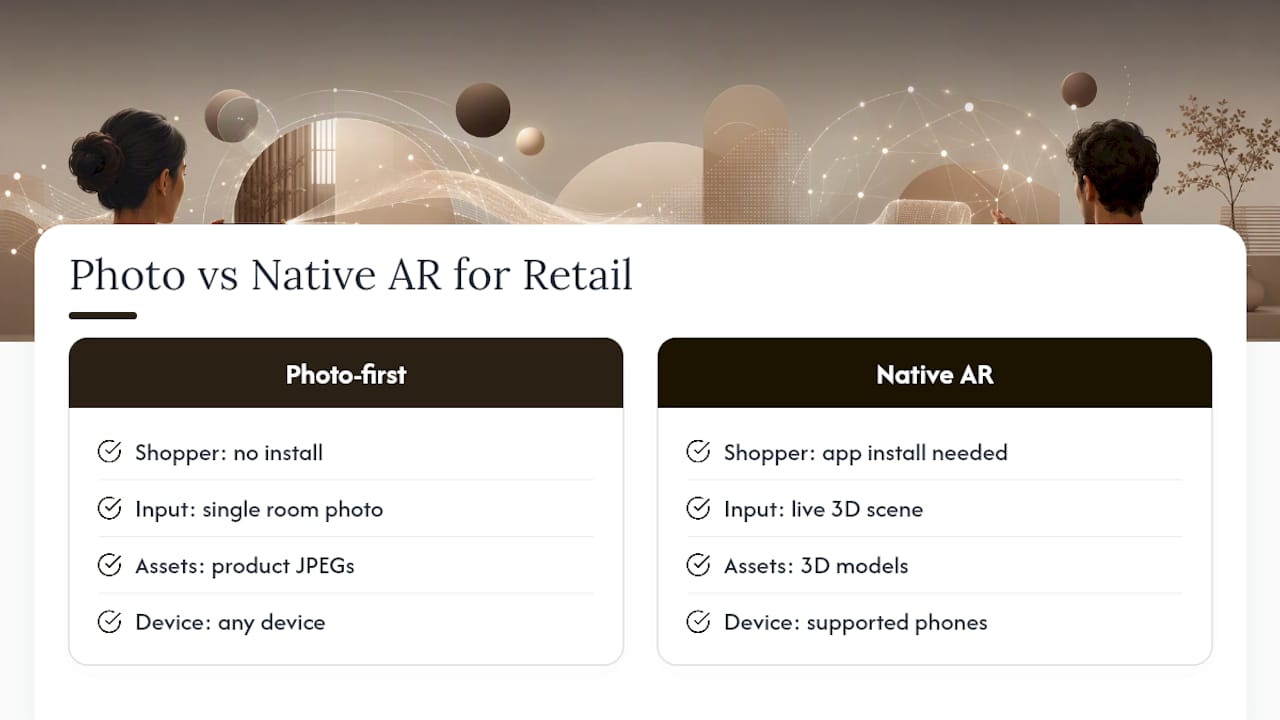
Strip away the jargon and the comparison that matters to a furniture retailer isn't browser-rendered 3D versus an app store download. It's a simpler split: photo-based room previews that need no download at all, versus anything that asks a shopper to install something or load a heavy 3D scene before they can see a sofa in their room.
Photo-based previews work by compositing. A shopper uploads a photo of their room, the retailer's product gets digitally placed into that exact image, and the result comes back looking like a real photograph rather than a rendered scene. No 3D model of the room. No camera permissions beyond a single snapshot. No spatial tracking. Just an image in, an image out.
This is a deliberate departure from the heavier visualisation methods some retailers have tried, where a customer needs an app, a supported phone, and patience for a 3D model to load and anchor to their floor. Photo compositing uses existing product JPEGs and image processing rather than building 3D assets, which is the whole reason it deploys faster and works on almost any device a shopper happens to be holding.
How does a photo-based room preview actually work?
The mechanics are simpler than most merchandising teams expect. Three steps, no exotic infrastructure:
- Upload. The shopper takes or selects a photo of their room, using their camera, their gallery, or drag-and-drop on desktop.
- Composite. The image goes to a server, where the chosen furniture item is scaled, positioned, and blended into the photo. This happens through image processing, not through building or streaming a 3D scene.
- Return. A finished preview image comes back to the product page, usually within seconds, ready to view, save, or share.
That middle step is the one worth understanding if you're briefing engineering or evaluating vendors. It's closer to professional photo editing than to game-engine rendering. Instead of a 3D model that has to be built, textured, and tested across devices, the system works from photographs the retailer already has.
On the technical side, most of these tools ship as an embeddable widget: a script tag added to the product page template, similar in spirit to how Cloudinary's browser upload widget accepts files from a local device, a URL, a camera, or cloud storage, and returns a callback once the upload succeeds. A short JavaScript snippet is typically enough to trigger the widget and handle that callback, which is why integration usually sits closer to a marketing team's skill set than a mobile engineering team's. Platform connectors for Shopify, Magento, BigCommerce, and WooCommerce mean most retailers are adding a widget to an existing template, not building a new checkout flow from scratch.
Why photo previews outperform app downloads for furniture shoppers
Furniture is what retail analysts call a low-frequency, high-consideration purchase. Someone buys a sofa every seven to ten years, not every season, so asking them to install an app for a single decision is a lot to demand for a one-off transaction. Browser-based approaches remove that install step entirely, letting the shopper get from curiosity to preview in the time it takes to tap a link.
That friction gap shows up directly in behaviour. A three-tap upload flow (open the tool, upload or capture a photo, generate the preview) works identically inside a mobile browser or a WebView embedded in another app, with no redirect and no install screen in between.
The commercial upside for retailers breaks down into three areas:
- Fewer returns. Uncertainty about scale and style is a leading cause of furniture returns; seeing the actual product against your actual wall colour resolves most of that uncertainty before checkout.
- Higher conversion on the fence. Shoppers who are close to buying but hesitant tend to convert once they've removed the "will it look right" doubt.
- New marketing surfaces. Email campaigns, paid social ads, and even QR codes on a showroom floor can all link straight to a preview, extending the tool beyond the product page itself.
Pro Tip: Run the same product through a preview link in a retargeting email, not just on the PDP. Shoppers who abandoned a cart over uncertainty about fit are exactly the audience this format is built to win back.
How do you actually roll this out on your store?
A working pilot doesn't need a big engineering ticket. It needs a checklist:
- Install the widget. Add the script tag or embed to one or two high-traffic product pages first, not your entire catalogue. Treat it as a bake-off, not a full launch.
- Choose your input sources. Most widgets support camera capture, gallery upload, a URL, and drag-and-drop. Default to camera on mobile and drag-and-drop on desktop; that matches how each device is actually used.
- Decide on signed versus unsigned uploads. Unsigned uploads are the fastest way to get a proof of concept running, while signed uploads give merchants tighter control once the tool moves from trial to permanent fixture.
- Wire up callbacks. Every successful upload should fire a callback that updates the dashboard, so you can see preview volume without digging through server logs.
- Run the numbers for 30 to 90 days. Track preview-to-add-to-cart rate, overall conversion on the pages carrying the widget, and return rate against a control group of pages without it.
The fastest version of this test uses a demo page built for running the widget against a live product URL, which sidesteps a full engineering sprint and gets a working preview in front of real shoppers within days rather than weeks.
Pro Tip: Pick your bake-off products carefully. Choose one item with a high return rate and one bestseller — the first tests whether previews cut returns, the second tests whether they lift conversion on something that already sells well.
What makes a room preview look convincing rather than fake?
The realism of the composite is what decides whether a shopper trusts it enough to buy. Get the photographic groundwork wrong and even accurate image processing looks off.
Guide shoppers to frame their photo well before they upload it:
- Keep the whole wall or the piece of furniture's intended spot in frame, not a tight crop.
- Include the floor line, since showing the floor and a wall edge helps automated systems judge scale and place shadows correctly.
- Shoot in daylight or with the room's normal lighting on, avoiding harsh flash.
Behind the scenes, the compositing engine needs to handle scale detection, shadow synthesis, and colour matching so the furniture doesn't look pasted on top of the photo. Occlusion matters too: if a lamp or a plant should logically sit in front of part of the new sofa, the render needs to respect that layering, not just drop the item on top of everything else in the frame.
Poor inputs happen constantly, whether it's a dim photo or one taken at a strange angle. The better systems degrade gracefully, either prompting the shopper with a guidance overlay ("try backing up a little further") or offering a manual scale adjustment rather than returning a distorted result. Measuring whether all of this actually works comes down to the same tools you already use elsewhere on the site: A/B testing preview-enabled pages against a control, watching session length and scroll depth, and reading the qualitative feedback shoppers leave when a preview looks wrong.
What does this cost, and how should you trial it?
Vendors in this space tend to charge in one of three shapes: per-preview metering, a monthly tier that includes a set number of previews with metered overage above that, or a custom enterprise contract for catalogue-wide volume. None of these require a long procurement cycle to test.
The sensible way in is to use a free-preview allowance to run a proper trial before any money changes hands. AI Furniture Solutions offers 500 free previews specifically for this purpose, enough to run a real bake-off across a handful of product pages rather than a single test render.
During that trial window, track:
- Previews generated per product
- Preview-to-cart rate compared with pages that don't have the widget
- Conversion uplift over a 30 to 90 day window
- Return rate on preview-enabled products versus your baseline
Numbers from a short trial like this tell you far more than a vendor's sales deck, because they're your shoppers, your catalogue, and your return policy.
When photo previews win, and when you need something bigger
Photo-based previews are the right first bet for most catalogue furniture retailers: occasional purchases, hundreds or thousands of SKUs, and no appetite to fund a 3D asset pipeline for every product variant. The return on a tool like this comes fast because the barrier to trying it is so low. There's no app for a shopper to abandon halfway through installing, and no 3D model to commission before you can test whether visualisation moves the needle at all.
Richer visualisation, whether that's a full 3D configurator or a native app experience, earns its cost when you have repeat buyers who'll use a tool more than once, made-to-order pieces with dozens of fabric and finish combinations, or genuinely high-ticket custom furniture where a customer might spend weeks deciding. That's a different budget conversation with a different payback period.
For everyone else, the sequence that makes sense is: run a bake-off, measure incremental revenue per preview against your baseline, then decide whether to scale it across the catalogue or invest further. The trade-offs between photo compositing, 3D models, and Shopify visualiser apps are worth understanding before you commit either way, but don't let that research delay a test you can run in a week.
— Michael
Try the photo-preview approach on your own product page
This approach provides a straightforward way to preview furniture without the cost of a 3D pipeline or requiring shoppers to install an app. Upload a photo, wait briefly, and see a product composited into a customer's room, live on the product page rather than buried in a separate app.
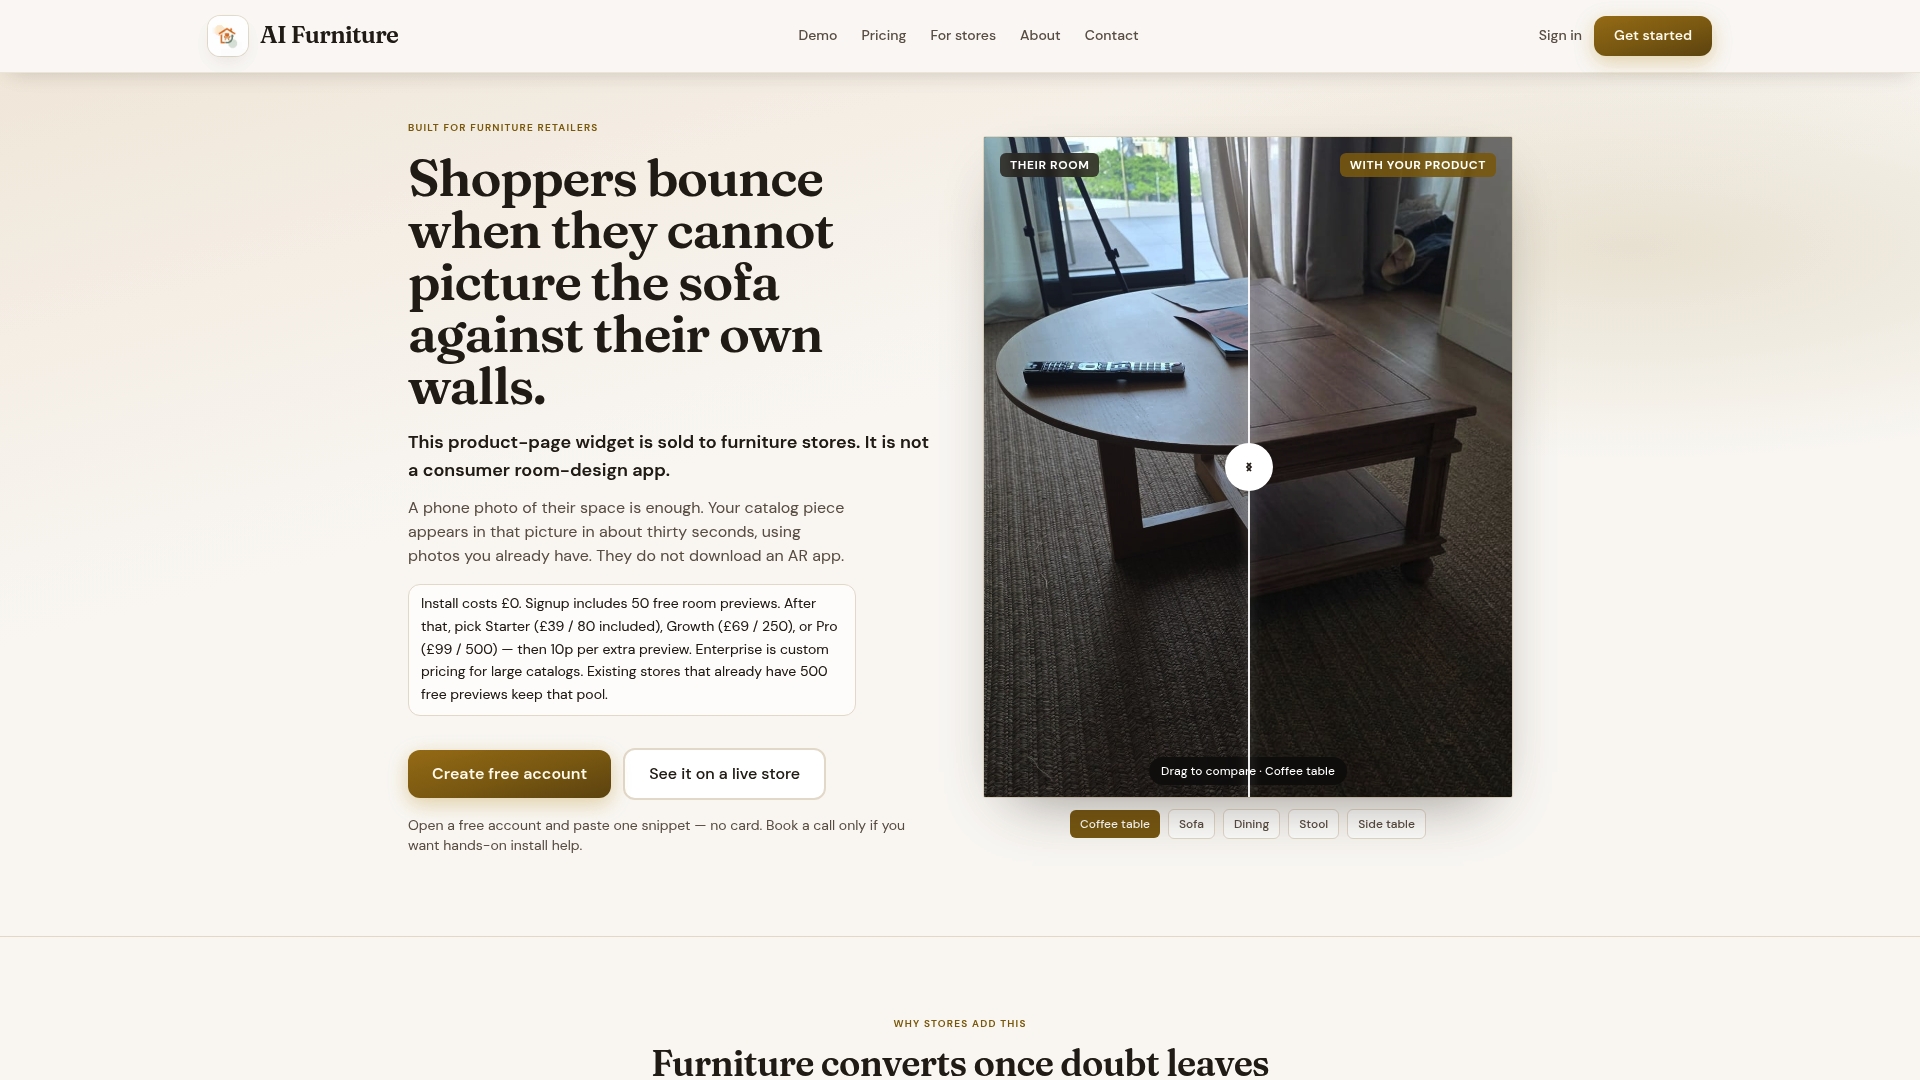
The trial is built to be genuinely low risk, with a free preview allowance to run your own bake-off before any billing starts. This allows testing different products side by side before committing to a monthly plan. If your store runs on Shopify, the furniture visualiser built for Shopify stores is the fastest way to get a widget live on a real product page. For a direct side-by-side against photography and 3D-model approaches, the comparison page lays out the trade-offs plainly. Start with the bake-off demo on your own product URL and see the composite before you decide anything.
Sources
For the technical build, Cloudinary's upload widget documentation covers integration options in detail. For merchandising context, Baby Love Growth's roundup of AI use cases in ecommerce is a useful companion read, alongside Aifurniture's own guide to installing photo room previews.
FAQ
What is the difference between web AR and native AR for furniture shopping?
In the context furniture retailers care about, the practical difference is friction: photo-based previews need no download at all, while app-based approaches require an install before a shopper sees anything.
Do shoppers need to download an app for a photo room preview?
No. Photo-based previews run through a browser widget on the product page itself, so the shopper uploads a photo and sees the result without leaving the site.
How long does a photo composite preview take to generate?
A composited preview is typically returned within a short period after the shopper uploads their room photo.
What information should a customer's photo include for the best result?
The photo should show the floor line and at least one wall edge in good lighting, since that combination helps the system judge scale and place shadows accurately.
How can a retailer trial a photo preview tool before paying?
Most vendors offer a free-preview allowance for exactly this purpose; some provide enough free previews so retailers can run a bake-off on real product pages first.